New parent surveys show 68% of families struggle with bottle storage chaos with the average household managing 8-12 bottles plus accessories scattered across counters, creating the cluttered mess that makes midnight feedings even more stressful. The organization breakdowns happen when bottles don’t dry properly before storage leading to mildew concerns or when essential feeding supplies end up buried in random cabinets requiring a scavenger hunt while holding a crying baby.
Baby bottle organization kitchen setups need to handle wet bottles, dry storage, formula prep, and quick access—all without taking over your entire counter space. The systems that actually stick are the ones you can use one-handed at 2 AM when you’re half-asleep and just need a clean bottle fast.
We’re covering 10 baby bottle organization kitchen solutions that work with real feeding schedules. These practical systems handle everything from drying racks to formula stations while keeping your kitchen functional for everyone else who lives there too.
Here’s what we’re getting into:
- Drying and storage solutions for wet bottles
- Formula prep stations that streamline feeding time
- Compact organization for small kitchen spaces
- Sanitizing and cleaning supply management
- Quick-access systems for nighttime feedings
- Transition strategies as babies grow
What Makes Baby Bottle Organization Actually Work
Drying Space Comes First: Bottles need somewhere to drain after washing—not just storage—because shoving wet bottles in cabinets creates mildew problems fast. A dedicated drying area with good airflow prevents the gross bottle smell while keeping counters from becoming permanent bottle forests. It’s like dish racks but specifically sized for baby gear. The drying-first approach stops bacteria growth before it starts.
Everything Lives in One Zone: Grouping bottles, nipples, formula, measuring tools, and bottle brushes in one designated area beats scattering supplies across the kitchen because you’re not hunting through three cabinets during feeding time. The concentrated station means grabbing what you need happens in one spot even when you’re exhausted. It’s like a coffee station but for bottles. The single-zone setup saves those precious minutes when baby’s hungry now.
Access Beats Aesthetics Every Time: Pretty organization that requires two hands and perfect lighting fails immediately because real bottle prep happens while holding a baby, in the dark, or both. Systems need one-handed operation with everything at arm’s reach. It’s like designing for actual use instead of Instagram photos. The practical access keeps organization working through sleep deprivation.
Storage Grows With Your Needs: Newborns use different bottles than six-month-olds who need different storage than toddlers transitioning to cups, so flexible systems beat custom solutions that only work for three months. Adjustable shelving and modular containers adapt as feeding changes. It’s like buying adjustable furniture instead of fixed sizes. The scalable approach prevents reorganizing every few months.
10 Baby Bottle Organization Kitchen Solutions
Get your feeding routine under control with these baby bottle organization kitchen ideas that handle the wet-dry cycle and midnight scrambles.
Countertop Drying Rack Station
Set up a dedicated bottle drying rack on your counter near the sink with sections for bottles, nipples, and pump parts. The specialized rack with individual pegs holds everything upright for proper draining while keeping wet items contained in one spot. It’s like a dish drainer designed specifically for baby gear.
Look for racks with removable trays for easy cleaning and enough capacity for your daily bottle rotation—usually 6-8 bottles minimum. Position near sink but not directly in splash zone. Compact racks run $25-$45. This baby bottle organization kitchen setup handles the constant wet-to-dry cycle without counter takeover.
Lower Cabinet Bottle Bin System
Use clear bins or caddies in lower cabinets storing clean dry bottles with matching lids organized together. The contained system keeps bottles from toppling while clear sides let you see supply levels at a glance. It’s like toy bins but for feeding gear.
Group by size if using multiple bottle types—newborn bottles separate from larger ones. Include small container for nipples and caps preventing the lost-in-the-cabinet shuffle. Bins cost $12-$30 depending on size. This baby bottle organization kitchen method works great for compact spaces needing everything behind closed doors.
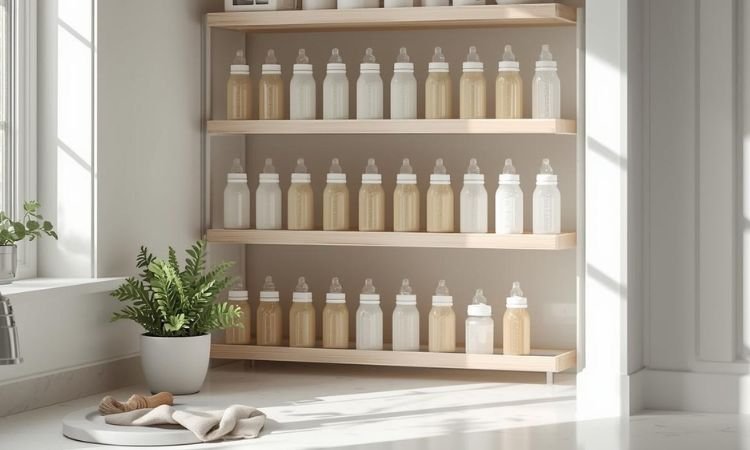
Wall-Mounted Drying Shelf
Install floating shelf above or beside sink creating elevated drying station with small drying mat. The wall-mounted approach frees counter space while gravity helps bottles drain. It’s like using vertical space that usually just holds wall art.
Choose shelf deep enough for bottles to sit securely—typically 8-10 inches. Include small basket for accessories. Expect $20-$50 for shelf and mounting. This baby bottle organization kitchen idea works perfectly in small kitchens where counter space is tight.
Rolling Cart Feeding Station
Dedicate a small rolling cart to all bottle supplies including clean bottles, formula, water pitcher, and prep tools. The mobile station rolls wherever needed—living room for evening feeds, bedroom for night feeds—while storing neatly in kitchen corner. It’s like a bar cart that actually gets used daily.
Top shelf for formula prep, middle for clean bottles, bottom for cleaning supplies. Choose cart with raised edges preventing items from rolling off. Carts run $40-$90. This baby bottle organization kitchen approach brings supplies to you instead of you hunting for supplies.
Drawer Divider System
Convert a kitchen drawer into organized bottle storage using adjustable dividers creating sections for bottles, nipples, caps, and accessories. The drawer setup hides everything while keeping items separated and easy to grab. It’s like silverware organizers but for baby stuff.
Use drawer near primary prep area for convenience. Line with washable drawer liner for easy cleaning. Dividers cost $15-$35. This baby bottle organization kitchen solution keeps feeding gear out of sight without making it inaccessible.
Over-Sink Dish Rack Adaptation
Position expandable over-sink dish rack holding drying bottles directly above sink. The suspended design uses unused air space while dripping bottles drain straight into sink. It’s like using that awkward space nobody thinks about.
Choose racks with adjustable width fitting your sink size. Include sections specifically for small items like nipples. Expect $30-$60 for quality over-sink racks. This baby bottle organization kitchen trick maximizes drying space without using any counter.
Cabinet Door Organizer
Mount over-door organizer on cabinet door near sink storing bottle brushes, dish soap, drying accessories. The door-back storage uses dead space while keeping cleaning tools handy but hidden. It’s like finding bonus storage in places you already have.
Choose organizers with deep pockets holding taller bottles of dish soap. Include small basket for sponges and brushes. Door organizers run $12-$25. This baby bottle organization kitchen addition pairs perfectly with other storage methods.
Lazy Susan Bottle Station
Place lazy susan turntable in corner cabinet organizing bottles and formula supplies in circle. The rotating access brings back-corner items forward without digging through everything. It’s like the spice rack concept applied to baby gear.
Group similar items together on turntable sections—bottles in one area, formula in another. Choose turntable sized for cabinet—typically 12-16 inches. Lazy susans cost $15-$35. This baby bottle organization kitchen system solves the corner cabinet black hole problem.
Hanging Basket Wall Storage
Install wire baskets on wall creating open storage for bottles and supplies. The visible system lets you see everything while keeping items off counters. It’s like produce baskets that happen to hold baby bottles instead.
Mount at comfortable reaching height near prep area. Use multiple baskets organizing by category—one for bottles, one for accessories. Baskets run $18-$40 for set. This baby bottle organization kitchen look works well in farmhouse or casual kitchen styles.
Stackable Container Tower
Use stackable clear containers creating vertical storage for bottles, nipples, and accessories in cabinets or pantry. The see-through stacking maximizes vertical space while keeping everything visible. It’s like food storage containers but for the baby feeding collection.
Label each container for quick identification during tired moments. Choose containers that nest when not in use. Expect $20-$45 for quality stackable set. This baby bottle organization kitchen approach adapts easily as baby grows and needs change.
Setting Up Your Bottle Organization System
Start With Your Feeding Routine: Count how many bottles you use between washing sessions—if you’re washing twice daily and using six bottles, you need storage for at least twelve bottles total accounting for drying and rotation. It’s like doing laundry math but for bottles. The honest assessment prevents buying too little storage or dedicating too much space.
Position Near Water Source: Set up your main bottle station within a few steps of the sink because you’ll be filling, washing, and prepping bottles here constantly throughout the day. It’s like putting the coffee maker near the water line—just makes sense. The proximity reduces those exhausting extra steps when you’re already tired.
Include Night Feed Supplies: Keep formula, room temperature water, and clean bottles accessible without turning on bright lights or making noise—maybe a lower drawer or shelf you can reach blindfolded. It’s like preparing for stealth mode feeding. The nighttime-ready setup means less disruption for everyone.
Plan for the Wet-Dry Transition: Create a clear path from “just washed and drying” to “clean and ready to use” so bottles don’t get stuck in limbo on the counter forever. It’s like having an in-box and out-box system. The defined flow keeps organization working even when you’re too tired to think.
Common Questions About Baby Bottle Organization
How Many Bottles Do You Actually Need?
Most families do well with 8-12 bottles allowing enough rotation between feedings and washing without constant cleaning. Newborns eating every 2-3 hours need more bottles in rotation than older babies on a schedule. Have enough that you’re not washing bottles in the middle of the night.
Your washing frequency determines bottle count. Washing twice daily needs fewer bottles than once-daily washing. The right number means always having clean bottles without excessive cabinet space.
Where Should You Store Formula?
Keep formula in a cool dry spot away from the stove—typically a cabinet or shelf near your bottle prep area but not directly above heat sources. Once opened, formula stays fresh about one month. Store measuring scoops with formula preventing the where-did-I-put-that hunt.
Unopened formula can go in pantry while opened containers need easy access near bottle station. The convenient storage speeds up feeding prep during those hangry baby moments.
How Do You Keep Bottles From Getting Moldy?
Make sure bottles dry completely before storing them—if you’re putting away bottles that are even slightly damp, mildew happens fast. Store bottles upside down or with parts separated allowing air circulation. Wash bottles within a few hours of use instead of letting formula residue sit.
Smell bottles occasionally catching any funkiness early. The completely-dry rule prevents gross bottle surprises. Replace bottles showing any discoloration or persistent smell.
What About Bottle Brush Storage?
Hang bottle brushes to dry instead of storing them wet in cabinets or drawers. Use adhesive hooks inside cabinet doors or wall-mounted holders near sink. Let brushes air dry between uses preventing bacteria buildup on the brush itself.
Replace bottle brushes every few months or when bristles look worn. The proper brush storage keeps your cleaning tools actually clean.
When Should You Transition Storage Systems?
As baby starts solids around six months, bottle use typically decreases while sippy cups and toddler cups increase. Gradually shift from large bottle storage to mixed bottle-and-cup organization. By twelve months many babies transition primarily to cups freeing up bottle storage space.
Adjust your system as needs change rather than maintaining bottle storage for bottles you’re not using. The flexible approach grows with your child.
Creating Your Family’s Bottle Station
Baby bottle organization kitchen systems work when they match your actual feeding routine—not some perfect setup that looks great but fails at 3 AM. The honest look at how many bottles you use, when you wash them, and where you prep them reveals what storage actually makes sense for your family. Systems that require two hands, good lighting, or five extra steps fall apart fast when you’re exhausted.
Start by tracking your bottle use for a few days noticing where bottlenecks happen. Are you constantly hunting for clean bottles? Do bottles pile up on the counter because there’s nowhere for them to dry? Is formula prep taking forever because supplies are scattered? The pain points show you exactly what to fix first. Set up stations that work for your space and schedule knowing this system only needs to last until your baby grows into the next phase.
What’s your biggest bottle organization struggle right now? Drop it in the comments—I guarantee you’re not alone!